Learn how to create your own AI chatbot like DeepSeek using Ollama and Python Flask. We cover installation, setup, and usage of DeepSeek model for local chatbot development.


In this blog post, we will guide you step-by-step on creating your own AI chatbot like DeepSeek using the Ollama model. We will also walk you through how to download Ollama, pull and run the DeepSeek-r1:1.5b model, and work with Python Flask to integrate everything into a web-based chatbot.
What is the Ollama and DeepSeek Model?
Ollama is a local AI model framework that allows you to run sophisticated AI models on your local machine, providing easy access to various models for chatbot development. One of the available models in Ollama is DeepSeek, which provides natural language understanding and generation capabilities for building intelligent chatbots. The DeepSeek-r1:1.5b model is a mid-range model with a parameter size of 1.5 billion, offering a balance of performance and speed. You can also experiment with higher-level models, but they come with increased system requirements for optimal performance.
Why Choose DeepSeek-r1:1.5b?
While the DeepSeek-r1:1.5b model is more lightweight and easier to run, you can also try higher parameter models for better accuracy and performance. However, these models demand higher system specifications, including more RAM, GPU power, and CPU capacity.
Prerequisites for Running DeepSeek with Ollama
Before we get started, here’s a quick checklist of the tools and technologies you’ll need:
- Python (preferably version 3.7 or higher)
- Flask (for creating the web server)
- Ollama (for running DeepSeek locally)
- DeepSeek Model (
deepseek-r1:1.5b) - Text Editor/IDE (like VSCode, PyCharm, or Sublime Text)
Step-by-Step Guide to Creating Your AI Chatbot
Now that you've ensured your system meets the requirements, it's time to get started with the implementation process.
1. Installing Ollama
To begin, you need to download and install Ollama on your system. Ollama is available for all major operating systems: Windows, macOS, and Linux.
How to Download and Install Ollama
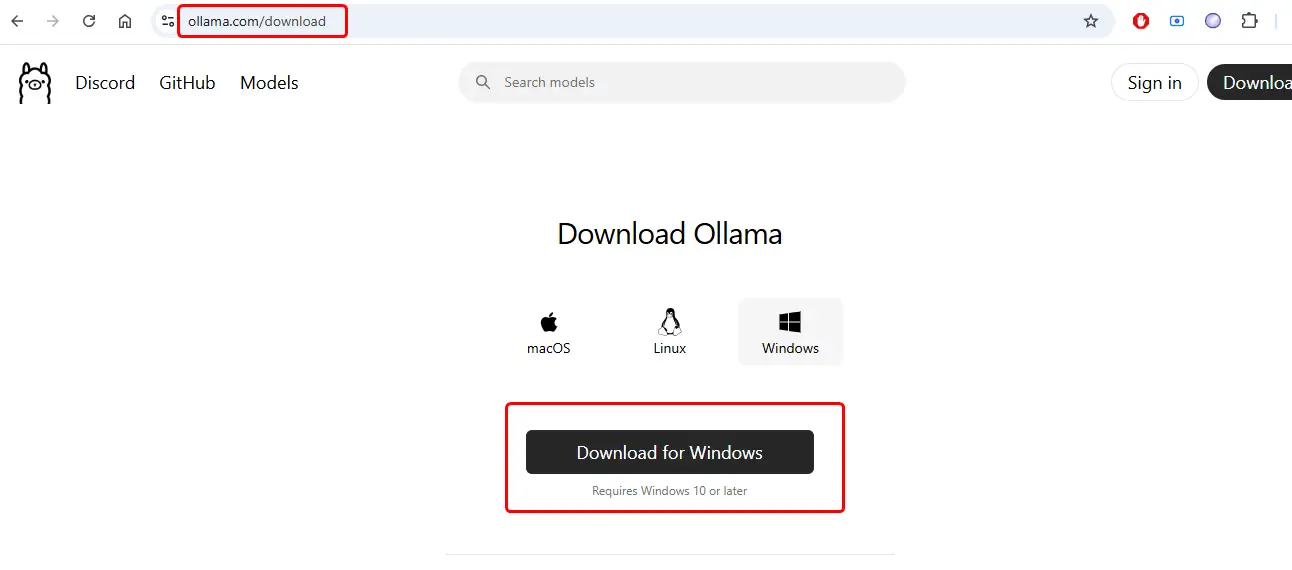
- For Windows:
- Visit the official Ollama website.
- Download the Windows installer.
- Follow the instructions to install Ollama on your machine.
- For macOS:
- Visit the Ollama download page.
- Download the macOS version.
- Drag the application to the Applications folder.
- For Linux:
- Follow the installation steps from the official Ollama GitHub.
- Install using the terminal by following the provided steps for your specific distribution (Ubuntu, Fedora, etc.).
After installation, verify it by running the following command in PowerShell:
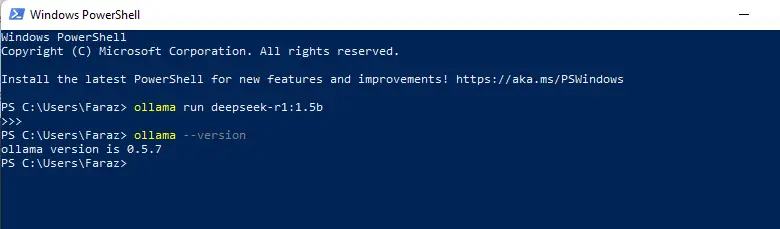
ollama --versionThis should show the version of Ollama that you have installed.
2. Pulling and Running the DeepSeek-r1:1.5b Model
With Ollama installed, it's time to pull the DeepSeek-r1:1.5b model and run it locally.
How to Pull the DeepSeek Model
- Open your terminal or command prompt.
- Type the following command to pull the model:
ollama pull deepseek-r1:1.5bThis command will download the model, which may take some time depending on your internet speed and system resources.
How to Run the Model
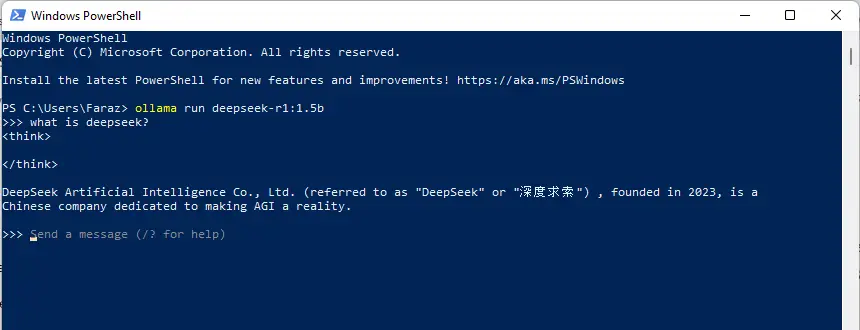
Once the model is pulled successfully, you can start using it to generate responses to user input. To initiate a chat, run the following command:
ollama run deepseek-r1:1.5bThis will start the model and allow you to interact with it locally.
3. Checking Available Models Using ollama list
If you want to see a list of available models on your system, including the DeepSeek-r1:1.5b model, simply run the following command:
ollama listThis will display all the models you have pulled and installed, including their version numbers. You can use this to verify that DeepSeek-r1:1.5b is available and ready to be used.
Step 3: Create Your Flask Application
With Ollama and the DeepSeek model up and running, let’s build a simple Flask web application that will allow you to interact with the model.
1. Install Flask
First, let’s install Flask and Ollama. Open your terminal and run the following commands:
pip install Flask
pip install ollama
Ollama is the package that allows you to interact with the DeepSeek model for generating chatbot responses. It’s a powerful tool for AI-driven conversations.
2. Set Up Your Flask Application
Create a new directory for your project and navigate to it. Then, create a Python file (app.py) with the following content:
from flask import Flask, render_template, request
import ollama

app = Flask(__name__)

def get_response_from_ollama(user_input):
    # Get the response from the locally running Ollama model
    response = ollama.chat(model="deepseek-r1:1.5b", messages=[{"role": "user", "content": user_input}])
    print(response)

    if 'message' in response:
        return response['message']['content']
    else:
        return 'Sorry, something went wrong.'


@app.route("/", methods=["GET", "POST"])
def index():
    user_input = ""
    bot_response = ""

    if request.method == "POST":
        user_input = request.form["user_input"]
        bot_response = get_response_from_ollama(user_input)

    return render_template("index.html", user_input=user_input, bot_response=bot_response)

if __name__ == "__main__":
    app.run(debug=True)
In this Python code:
- We’re importing Flask to create the web app and
ollamato interact with the AI model. - The function
get_response_from_ollama()sends a user’s input to the DeepSeek model and retrieves the response. - The
index()route handles both GET and POST requests, showing the user’s message and the chatbot’s response on the web page.
3. Create HTML Template
Now, let’s create the HTML template to render the chatbot interface. Create a folder named templates in the same directory as your app.py, and inside it, create a new file called index.html:
<!DOCTYPE html>
<html lang="en">
<head>
    <meta charset="UTF-8">
    <meta name="viewport" content="width=device-width, initial-scale=1.0">
    <title>Chatbot using Ollama (Local)</title>
    <style>
        body { font-family: Arial, sans-serif; background-color: #f0f0f0; margin: 0; padding: 0;}
        .container { width: 50%; margin: 0 auto; padding: 20px; background-color: #fff; border-radius: 8px; box-shadow: 0 4px 8px rgba(0, 0, 0, 0.1); }
        h1 { text-align: center; }
        .chat-box { margin-top: 20px; border-top: 2px solid #ddd; padding-top: 20px;}
        .chat-box .user-message, .chat-box .bot-message { padding: 10px; margin: 10px 0; border-radius: 5px;}
        .user-message { background-color: #e1f5fe; text-align: right;}
        .bot-message { background-color: #f1f1f1;}
        form { margin-top: 20px;}
        input[type="text"] { width: 80%; padding: 10px; border-radius: 5px; border: 1px solid #ddd;}
        button { padding: 10px 20px; border: none; background-color: #007BFF; color: white; border-radius: 5px; cursor: pointer;}
    </style>
</head>
<body>
    <div class="container">
        <h1>Chatbot</h1>
        <div class="chat-box">
            {% if user_input %}
                <div class="user-message">{{ user_input }}</div>
                <div class="bot-message">{{ bot_response }}</div>
            {% endif %}
        </div>
        <form method="POST">
            <input type="text" name="user_input" placeholder="Ask me something..." value="{{ user_input }}" required>
            <button type="submit">Send</button>
        </form>
    </div>
</body>
</html>
4. Running Your Flask App
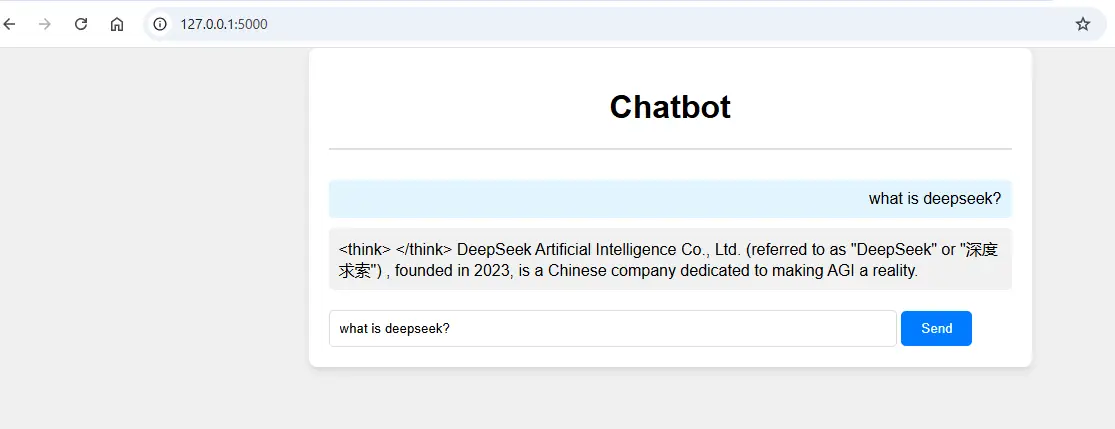
To run your Flask application, execute the following command in the terminal:
python app.pyThis will start your Flask app on http://127.0.0.1:5000/, where you can interact with your local AI chatbot powered by DeepSeek.
Minimum System Requirements to Run DeepSeek Models
To run the DeepSeek-r1:1.5b model efficiently, your system should meet the following minimum requirements:
For deepseek-r1:1.5b:
- CPU: A modern multi-core processor (i5 or better recommended).
- RAM: At least 8GB of RAM.
- Storage: At least 10GB of free disk space for model storage and temporary files.
- GPU (Optional): Having a GPU (e.g., NVIDIA GTX 1060 or higher) can significantly speed up the inference process. However, it is not strictly necessary for the 1.5b model.
- Operating System: Windows 10 or higher, macOS 10.15 (Catalina) or higher, or Linux.
For High-End Models:
If you decide to use more advanced models for higher accuracy, you may need:
- CPU: A powerful multi-core processor (i7 or higher).
- RAM: 16GB or more.
- Storage: 20GB+ of free space.
- GPU: A high-performance GPU like NVIDIA RTX 2080 or higher is highly recommended.
- Operating System: Linux or Windows 10/11 with support for CUDA if you are using a GPU.
For best results, especially if you are planning to experiment with higher models, make sure you have a high-end system. For instance, models with more parameters (like 7B or 13B) will require robust GPUs and ample RAM to run smoothly.
Conclusion
Creating your own AI chatbot using Ollama and the DeepSeek model in Python Flask is a straightforward process. While we demonstrated using the DeepSeek-r1:1.5b model, you can experiment with higher-level models like DeepSeek-r1:7b or DeepSeek-r1:13b. However, these models require a more powerful system with a dedicated GPU and a large amount of RAM.
Remember, for the best experience, ensure your system meets the recommended specifications for running large models. By following this guide, you can easily set up and create your own chatbot powered by Ollama and DeepSeek.

That’s a wrap!
I hope you enjoyed this article
Did you like it? Let me know in the comments below 🔥 and you can support me by buying me a coffee.
And don’t forget to sign up to our email newsletter so you can get useful content like this sent right to your inbox!
Thanks!
Faraz 😊
Subscribe to my Newsletter
Get the latest posts delivered right to your inbox
Latest Components

Free HTML News Website Landing Page Code Snippet: Modern & Responsive
by Faraz - April 21, 2026Download a free, high-performance HTML news website landing page template. Built with Tailwind CSS and JavaScript, this "Newstant" template is optimized for corporate news and business intelligence portals.
")

Modern Responsive Header with Search Bar: Free HTML, CSS, & JS Code Snippet
February 02, 2026
")


Animated Login Buttons with HTML, CSS & JavaScript
by Faraz - August 25, 2025Learn how to create animated login buttons using HTML, CSS, and JavaScript. Step-by-step guide for stylish and interactive login buttons.


Create Neon Brick Breaker Game using HTML CSS JS
by Faraz - April 05, 2025Learn how to create a Neon Brick Breaker game using HTML, CSS, and JavaScript. Simple steps for beginners to build a glowing arcade-style game.


Build a Password Generator with HTML, CSS & JS - Easy Guide
by Faraz - October 08, 2025Learn how to make a random password generator using HTML, CSS, and JavaScript. This beginner tutorial includes step-by-step code and tips for strong passwords. Start coding today!


Create Image Color Extractor Tool using HTML, CSS, JavaScript, and Vibrant.js
January 23, 2024


Create Sticky Bottom Navbar using HTML and CSS
by Faraz - August 29, 2024Learn how to create a sticky bottom navbar using HTML and CSS with this easy-to-follow guide.
")
")
")
