Discover how to build a custom Chrome extension to streamline your browsing experience and increase productivity. Read now.


Chrome is the most popular web browser today, with over 60% of the market share. It is known for its simplicity, speed, and security, making it the ideal browser for everyday use. However, one of the best things about Chrome is the ability to add extensions to enhance your browsing experience. This article will guide you through the process of creating a Chrome extension that works for you.
What is a Chrome Extension?
A Chrome extension is a small software program that extends the functionality of the Chrome browser. It can add new features to the browser, modify existing features, or change the appearance of the browser. Chrome extensions can be found in the Chrome Web Store, and they are easy to install and use.
Why Build Your Own Chrome Extension?
There are many reasons why you may want to build your own Chrome extension. For example, you may want to automate a task that you perform regularly, add a feature that you can't find in other extensions, or simply customize your browsing experience to better suit your needs. Whatever your reason, building a Chrome extension is a relatively simple process that anyone can do.
What You Need to Know Before You Start
Before you start building your Chrome extension, you need to have a basic understanding of HTML, CSS, and JavaScript. You should also have a general understanding of how web pages work. If you are not familiar with these technologies, it may be a good idea to take a course or read a book to familiarize yourself with them.
Prerequisites
Before you start building your Chrome Extension, you'll need to have a few things in place:
- A Google Chrome browser installed on your computer
- Basic knowledge of HTML, CSS, and JavaScript
- A text editor such as Visual Studio Code
Setting up the Development Environment
To set up your development environment, follow these steps:
- Open Google Chrome and go to the Chrome Web Store
- Click on the "Developers Dashboard" button
- Sign in with your Google account
- Click on the "Add new item" button
- Fill out the required information, such as the extension name, description, and version number
Step 1: Decide What You Want Your Extension to Do
The first step in building a Chrome extension is to decide what you want your extension to do. This could be anything from adding a new feature to your browser to changing the appearance of your browser. Once you have a clear idea of what you want your extension to do, you can move on to the next step.
Step 2: Create a Manifest File
A manifest file (manifest.json) is a simple JSON file that tells Chrome about your extension. It includes information such as the name of your extension, the version number, and the permissions that your extension needs. The manifest file is the first thing that Chrome will look for when you load your extension, so it is important to get it right.
Here’s the Basic Format.
{
"manifest_version": 2,
"name": “EXTENSION NAME",
"description": "DESCRIPTION",
"version": "1.0",
"browser_action": {
"default_icon": “ICON (WITH EXTENSION) ”,
"default_popup": “LAYOUT HTML FILE"
},
"permissions": [
//ANY OTHER PERMISSIONS
]
}
Here is our Manifest.json file
{
    "name": "Random HEX Color Generator",
    "version": "1.0.0",
    "description": "Random HEX Color Generator",
    "manifest_version": 3,
    "author": "codewithFaraz",
    "action":{
        "default_popup": "data.html",
        "default_title": "Random HEX Color Generator"
    }
}
Step 3: Write Your Code
Once you have your manifest file in place, it's time to start writing your code. Your code should be written in HTML, CSS, and JavaScript, and it should be designed to do what you want your extension to do. There are many resources available online to help you get started with writing your code, including tutorials, forums, and blogs.
Create a new file called data.html.
It is the HTML that POPS UP when you click the Chrome extension button.
<!DOCTYPE html>
<html>
<head>
<title>Random HEX Color Generator</title>
<meta charset="utf-8">
<link rel="stylesheet" href="styles.css">
</head>
<body>
<div>
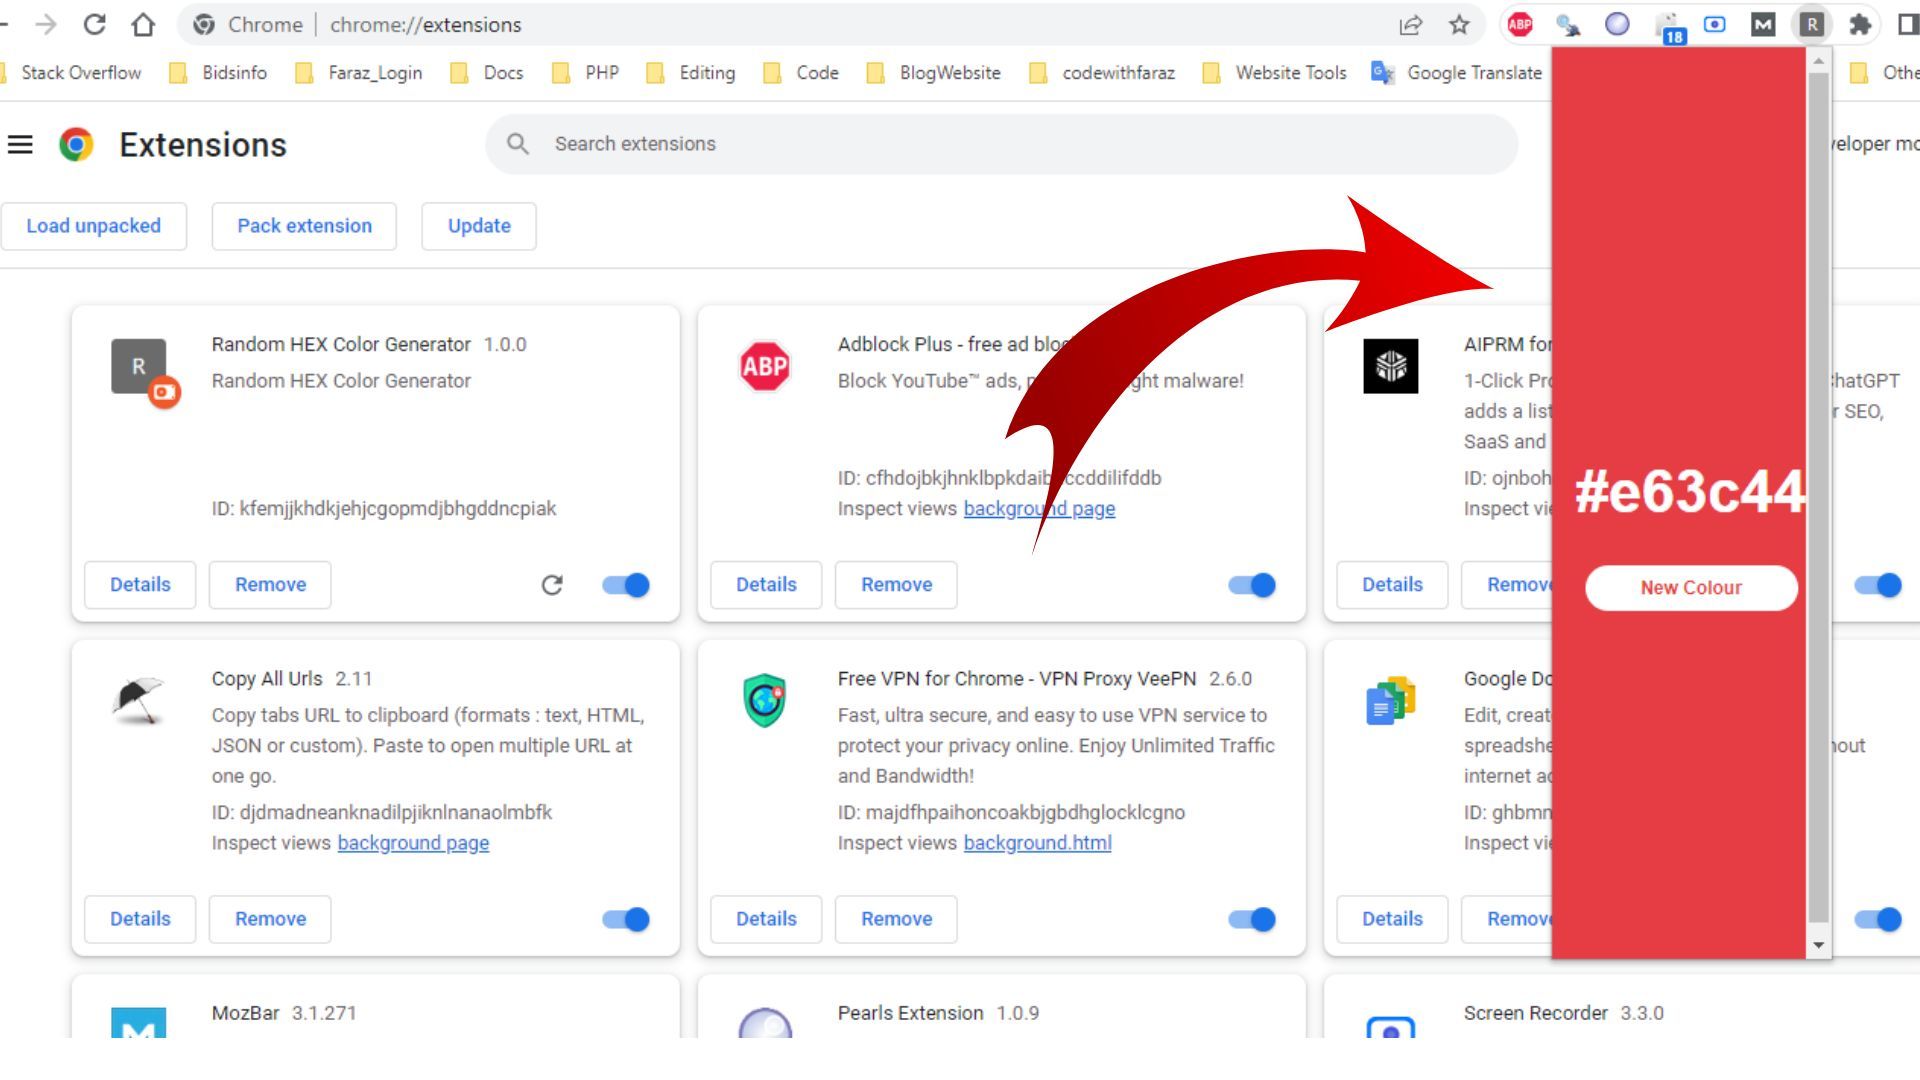
<h1 id="colour">#e63c44</h1>
<button id="change">New Colour</button>
</div>
<script src="scrip.js"></script>
</body>
</html>
Create the JavaScript file, let’s call it, scrip.js, Since we are creating a simple HTML file, you can skip this step completely as our present project won’t be needing any JavaScript.var btn = document.getElementById('change');
var text = document.getElementById('colour');
var generator = function() {
newColour = '#'+(Math.random()*0xFFFFFF<<0).toString(16);
console.log(newColour.length);
if(newColour.length < 7) {
generator();
}
}
btn.addEventListener('click', function() {
generator();
document.body.style.background = newColour;
btn.style.color = newColour;
text.innerText = newColour;
});
Step 4: Test Your Extension
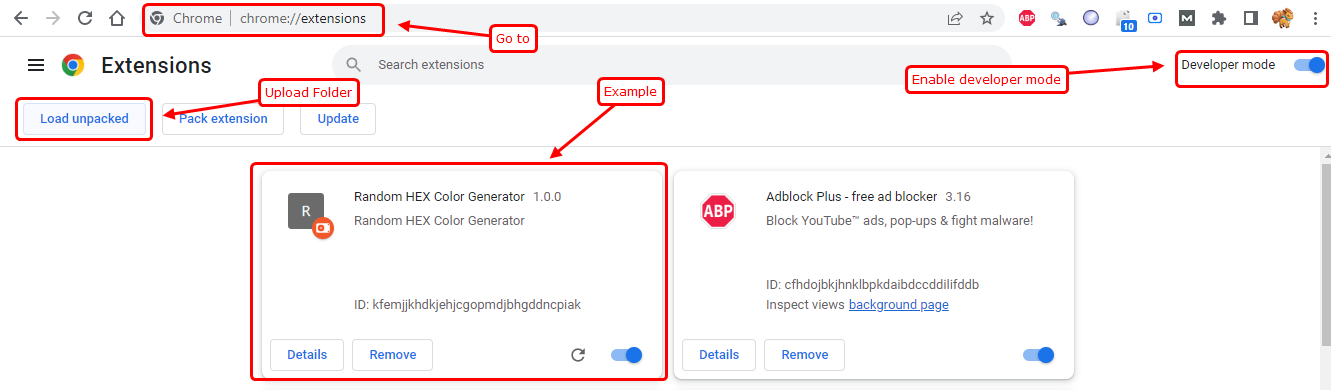
Once you have written your code, it's time to test your extension. You can do this by loading your extension into the Chrome browser. You can load your extension by navigating to the extensions page or Opening the chrome://extensions page, clicking on the "Developer Mode" button, and then clicking on the "Load Unpacked" button upload your folder.
Step 5: Publish Your Extension
If your extension is working as expected, you can publish it to the Chrome Web Store. This is a simple process that only takes a few minutes. Once your extension is published, anyone can install and use it.
Tips for Making Your Extension User-Friendly
Making your Chrome Extension user-friendly is crucial to its success. In this section, we'll provide tips for making your extension appealing and easy to use for your users.
User-Centered Design
Design your Chrome Extension with the user in mind. Consider their needs and wants, and make sure the functionality is clear and concise.
Clear and Concise Functionality
Make sure your Chrome Extension has a clear purpose and that its functionality is easy to understand. Avoid cluttering the interface with too many options and make sure the icons are easily recognizable.
Regular Maintenance and Upgrades
Keep your Chrome Extension up-to-date and bug-free by regularly performing maintenance and upgrades. This will keep your users happy and ensure that your extension continues to work well.
Benefits of Using a Chrome Extension
There are several benefits to using a Chrome extension, including:
- Increased productivity: A well-designed Chrome extension can automate repetitive tasks and streamline your browsing experience, freeing up your time and boosting your productivity.
- Customization: Chrome extensions can be tailored to your needs, making your browsing experience more personalized.
- Improved security: Some Chrome extensions provide added security features, such as blocking ads or preventing data tracking, helping to keep your information safe.
Common Chrome Extension Features
Some common features that can be included in a Chrome extension include:
- Bookmarking: A bookmarking feature can simplify your bookmark management and allow you to save and access your favorite web pages quickly.
- Notifications: A notifications feature can alert you to important events or updates, keeping you informed and up-to-date.
- Data retrieval: A data retrieval feature can gather and organize data from multiple sources, making it easier for you to access and use.
- Automation: An automation feature can automate repetitive tasks, freeing up your time and boosting your productivity.
Conclusion
Building a Chrome extension can be a fun and rewarding experience that can improve your browsing experience and boost your productivity. By following the steps outlined in this article, you'll be well on your way to building a Chrome extension that works for you. With its customizable features and increased efficiency, a Chrome extension is a must-have tool for anyone looking to streamline their browsing experience.

That’s a wrap!
Thank you for taking the time to read this article! I hope you found it informative and enjoyable. If you did, please consider sharing it with your friends and followers. Your support helps me continue creating content like this.
Stay updated with our latest content by signing up for our email newsletter! Be the first to know about new articles and exciting updates directly in your inbox. Don't miss out—subscribe today!
If you'd like to support my work directly, you can buy me a coffee . Your generosity is greatly appreciated and helps me keep bringing you high-quality articles.
Thanks!
Faraz 😊

")

")


")
")
")
